
Meditation and Pain Management Techniques: Five Yoga Exercises

Our brain circuit is a very complex subject involving a great deal of biological, cognitive and social functioning. Brain produces different chemicals that causes the feelings of pleasure and pain. When certain part of the brain is “turned on” or “turned off” , we fell pleasure or pain.  We feel pleasure when we we enjoy something like eating good food or being in love.  Our brain has its own reward system. When we do certain things, the brain rewards us by making us feel good. Reward is a great way to encourage us to do something repetitively. Similarly, there is a pain circuit in the brain. When certain things happen in our body or mind, the brain punishes us by developing bad feelings, so that we should not repeat that next time. Yoga and meditation helps people consciously control the perception of pain and pleasure.  The new understanding and perceptions relieves pain.  During pain the blood vessels serve as a radiator to cool the brain, overheating can cause neuron death.

Five Yoga Exercises Pain Management:

#1: Observe your normal breathing patterns

Try to observe your normal breathing patterns.  Do not try to control, remove or diminish your negative sensations or the private events of your life.  Try to accept the unpleasant sensations or thoughts while still persisting with your chosen tasks.

#2: Breathing Exercises:

You can breathe into the area around the pain sensation or around the belly. Yoga literature proposed several breathing techniques to overcome pain. The easiest one is;  place one hand on the chest and another on the belly.  Take a slow and deep breath, take as much air as possible. You can press the belly a little bit, with one hand. After holding the breath for a few seconds, exhale slowly.

#3: Present Moment Awareness

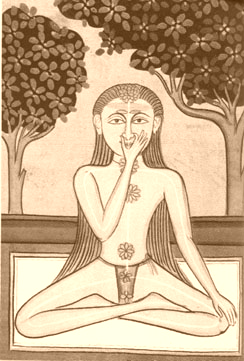
Present moment awareness is the most efficient and the most ancient meditation technique for pain management. Yoga literature is flooded with present moment awareness meditation techniques for pain management.  You can just bring your awareness to the activities you are doing.  Khechari mudra is a great way for pain management.  If  the khechari mudra is perfect, one can withdraw the mind from the body.

#4: Yoga Nidra for Pain Management

Yoga nidra is a very ancient meditation technique for pain management. In modern literature there are various forms of muscle relaxation techniques. This technique involves slowly tensing, briefly holding, and then releasing each muscle group in a systematic fashion. It starts  with the muscles in the toes and moving upward. During this exercise, the person should notice the differences between tension and relaxation.

#5: Meditation and Visualization for Pain management

Visualization involves imagining a scene in which you feel at peace, free to let go of all tension and anxiety. You may meditate with eyes open or closed.  Select a simple geometrical shape or symbols, with  some specific color. Think of something which may be symbolically meaningful for you in some way.  For example, you can select some green circles. You can chant any mantra of your choice during visualization meditation.

Meditation and prayers are the great ways to overcome pain. Acceptance is very important in pain management. Mentally, you may say, “It is unpleasant but I can accept it”. Pain is always unpleasant but mediation changes the nature of pain before it is perceived.

Sources:

1. “Meditation: Insights and Inspirations”  By Amit Ray

2. “Handbook of Pain Management: A Clinical Companion to Textbook of Pain”  By Ronald Melzack

Three Easy Pranayama for Relaxation

Pranayama (relax yoga breathing exercises) teaches us the appropriate way to breathe. However, often it is not possible for us to do regular pranayama in a systematic manner. Here, I am trying to give three very simple but effective pranayama techniques, which can be done at any place and almost at any time. It greatly reduces the stress, strain and anxiety. It requires no equipment. Although you can do these exercise in any position, sit with your back straight while doing the exercises.

Relax Breathe Counting:

If you are in stress and strain or in challenging work and wanted get out of that, try this simple technique.

  • Sit in a comfortable position with the spine straight and head inclined slightly forward. Gently close your eyes and take a few slow-deep breaths. Then let the breath come naturally without trying to pressure it. Ideally it will be quiet and slow, but depth and rhythm may vary.
  • To begin the exercise, count “one” to yourself as you exhale.
  • The next time you exhale, count “two,” and so on up to “five.”
  • Then begin a new cycle, counting “one” on the next exhalation.

Never count more than “five,” and count only when you exhale. After five, gain start from one. Try to do 3 minutes of this form of meditation.

Abdominal Pumping and Relax Breathing:

The steps are as follows:

  • Sit, or stand in a relaxed position.
  • Slowly inhale through your nose and count up to three.
  • As you breathe in, your shoulders will rise. Increase your lung capacity by expanding your abdomen. When you breathe in, practice the expansion of your abdomen as a habit. It is actually the key to good breathing.
  • When you exhale, push the stale air out by squeezing your stomach down in the pelvic area. This muscular action (abdomen pumping) has the beneficial effect of activating the organs in your stomach, improving their functioning. Repeated abdomen pumping also disperses any excess adrenaline, which may have been triggered by stresses.

Use abdomen pumping for three to five times, whenever you feel under any stress.

4-7-8 Relaxing Breathing:

  • You may put the tip of your tongue against the ridge of tissue just behind your upper front teeth, and keep it there through the entire exercise. You will be exhaling through your mouth around your tongue; try pursing your lips slightly if this seems awkward.
  • Exhale completely through your mouth, making a “shuuoooo” sound.
  • Close your mouth and inhale quietly through your nose to a mental count of four.
  • Hold your breath for a count of seven.
  • Exhale completely through your mouth, making a whoosh sound to a count of eight.
  • This is one breath. Now inhale again and repeat the cycle three more times for a total of four breaths.

Note that you always inhale quietly through your nose and exhale audibly through your mouth. The tip of your tongue stays in position the whole time. Exhalation takes twice as long as inhalation. The absolute time you spend on each phase is not important; the ratio of 4:7:8 is important. If you have trouble holding your breath, speed the exercise up but keep to the ratio of 4:7:8 for the three phases. With practice you can slow it all down and get used to inhaling and exhaling more and more deeply. Among these, you may practice ujjayi pranayama for establishing balance in life.

Pranayama Breathing

Pranayama in Daily Life

Breath of Fire: Kapalabhati Pranayama

Kapalabhati is a very active, forced exhalation with a passive inhalation. To exhale, the belly quickly pumps into the spine forcing the air out of the nose (like trying to blow out a candle through you nose). Place a hand on your belly to feel the belly actively pumping. Play with the tempo (30-40 exhalations/60 seconds), but keep a steady rhythm. Try starting with 2-3 rounds of 15 exhalations. Then, gradually increase the exhalations, as you feel comfortable.

Nostril Alternating Breath: Nadi Sodhana Pranayama

Close off your right nostril with the thumb and inhale into the left nostril. Next, close off your left nostril with your forefinger (or another finger), open the right nostril by removing your thumb and exhale through the right nostril. Keep your fingers where they are and inhale into the right nostril. Close the right nostril with your thumb, open the left, and exhale through the left nostril. Repeat. This is one “round”. Try doing 4 “rounds” when you begin. As you feel more comfortable, try 10 or 15 rounds.

Pranayama Breathing
Pranayama Breathing

Three Part Breath: Dirga Pranayama

Dirga Pranayama is called the three part breath because you are actively breathing into three parts of your abdomen. The first position is the low belly (just below the belly button), the second position is the low chest (belly and lower half of the rib cage), and the third position is the upper chest and low throat (just above the top of the sternum). The breath is continuous, inhaled and exhaled through the nose. The inhalation starts in the first position, the low belly; then moves to the second position, the low chest; then to the third position, the upper chest and low throat. The exhalation starts in the low throat and upper chest, moves to the low chest, and finishes in the low belly. Rest your hands on the individual positions to feel the breath rising and falling through each position. When you start practicing, you may want to individually isolate the movement in each position, using the hands. When you have a good feel for the breath moving in and out of each position, begin to practice without your hands.